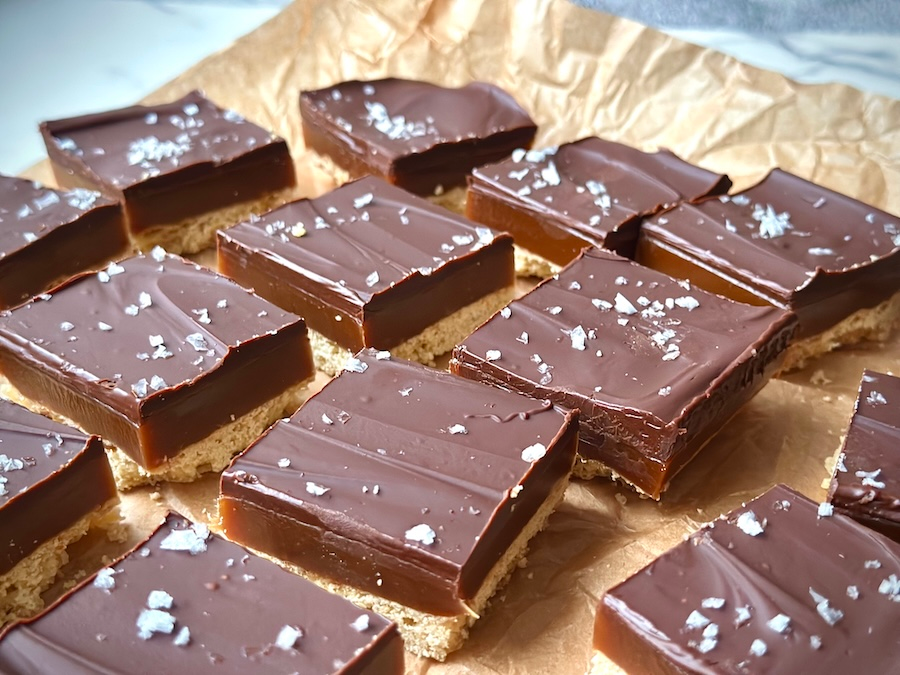
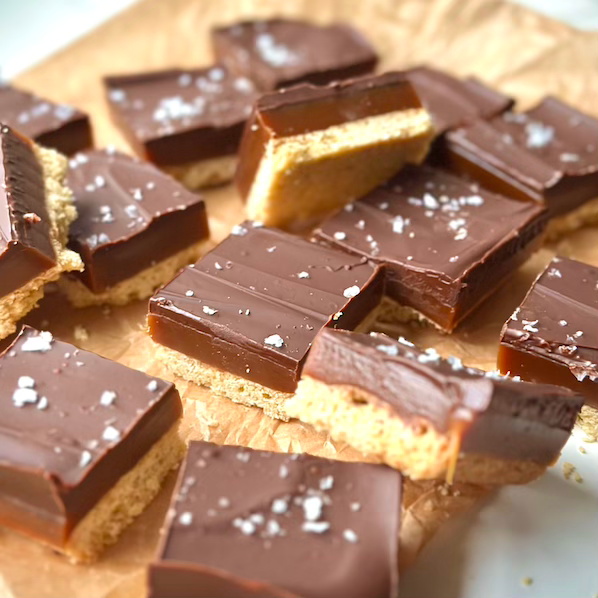
Experience the ultimate harmony of textures with this refined take on The Perfect Millionaire’s Shortbread. It begins with a buttery, melt-in-the-mouth shortbread base, expertly baked to provide a delicate yet sturdy foundation. Layered above is a rich, golden caramel that offers a smooth, decadent sweetness in every bite. To finish, a velvety chocolate topping provides that signature, satisfying snap that defines a truly professional traybake. This recipe balances these three iconic layers to perfection, creating a treat that is as elegant as it is indulgent. It is a simple yet inviting classic, reimagined for the modern baker who appreciates a sophisticated finish.
Ingredients
The Shortbread Base
The foundation of a professional millionaire’s is a shortbread that is sturdy enough to support the caramel, yet delicate enough to melt on the palette.
-
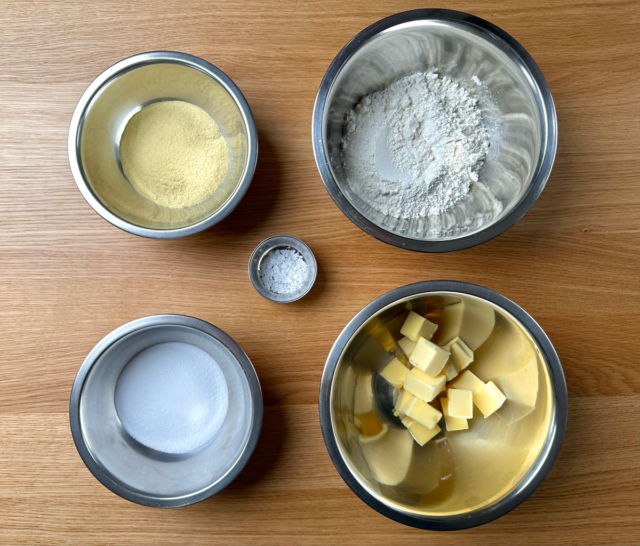
Plain Flour (9-11%) – A low protein flour provides the ideal structure; it’s strong enough to hold its shape but low enough in gluten to ensure a tender, crumbly finish.
-
Fine Semolina – The secret to a truly authentic “short” texture, adding a subtle, sophisticated crunch that distinguishes it from a standard biscuit.
-
Caster Sugar – Chosen for its fine crystals, which dissolve effortlessly into the butter for a perfectly smooth, uniform dough.
-
Sea Salt: A vital inclusion to sharpen the buttery notes and provide a counterpoint to the sweetness of the coming layers.
-
Unsalted Butter: High-quality butter is the primary flavour driver here; using unsalted allows for total technical control over the seasoning of the dough.
The Golden Caramel
A luxurious, stable caramel requires a balance of fat and sugar to achieve that signature “fudgy” bite without being overly sticky.
-
Caster Sugar: Carefully caramelised to create the deep, amber base and complex toasted flavour.
-
Whipping Cream (35-40% Fat): The high fat content is essential for a velvety mouthfeel and ensures the caramel sets with a professional, clean-cutting consistency.
-
Unsalted Butter: Whisked into the caramel to add a rich, creamy finish and a professional, glossy sheen. From a technical standpoint, the butter acts as a vital stabiliser; as the fats emulsify with the sugar and cream, they provide the necessary structure to ensure the caramel achieves a firm set that holds its shape perfectly when sliced, rather than flowing or weeping.
-
Sea Salt: Elevates the caramel from simple sweetness to a sophisticated, “salted” profile that cuts through the richness of the dairy.
The Chocolate Topping
The final layer must provide a clean snap while remaining soft enough to slice without shattering the caramel beneath.
-
Dark Chocolate: Provides a bold, slightly bitter contrast to the sweet caramel, ensuring the finished slice is well-balanced.
-
Unsalted Butter: Gently melted into the chocolate to lower the setting point; this technical addition ensures a glossy finish and a “soft-snap” texture that makes for a perfect, clean slice.
All The Equipment You Need
Storage
Short-Term: Room Temperature
Shelf Life: 4 to 5 days.
Method: Once the chocolate has fully set, store the slices in an airtight container in a cool, dry place. Keeping them at room temperature is the best way to maintain the delicate, “short” texture of the semolina-enriched base and the soft, fudgy bite of the caramel.
Note: If your kitchen is particularly warm, the chocolate may soften. In this instance, move the container to a cooler spot to prevent the layers from merging.
Mid-Term: Refrigeration
Shelf Life: Up to 2 weeks.
Method: Place the slices in an airtight container, using sheets of parchment paper between layers to prevent the chocolate from sticking.
Serving Tip: Refrigeration firms up the butter in the caramel and chocolate, creating a much harder set. For the best mouthfeel, allow the slices to sit at room temperature for 15–20 minutes before serving. This allows the fats to soften slightly, reviving the creamy texture of the caramel and the buttery notes of the shortbread.
Long-Term: Freezing
Shelf Life: Up to 3 months.
Method: Millionaire’s Shortbread freezes remarkably well because of its high fat content and low moisture levels. Ensure the slices are completely chilled in the fridge first to lock in the structural set.
Protection: Wrap individual slices tightly in a double layer of cling film, followed by a layer of heavy-duty aluminium foil to prevent freezer burn and keep the chocolate from blooming.
Thawing: Thaw the slices overnight in the refrigerator. To maintain the integrity of the layers and that signature clean-cut snap, avoid defrosting at room temperature, as rapid temperature changes can cause moisture to form on the chocolate surface.
The Perfect Millionaire’s Shortbread
Ingredients
Equipment
Method
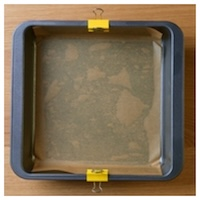
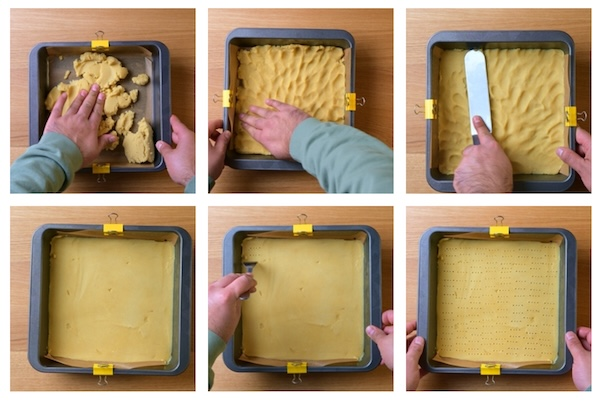
- Line a 9x9 inch brownie tin with greaseproof paper and set to the side.

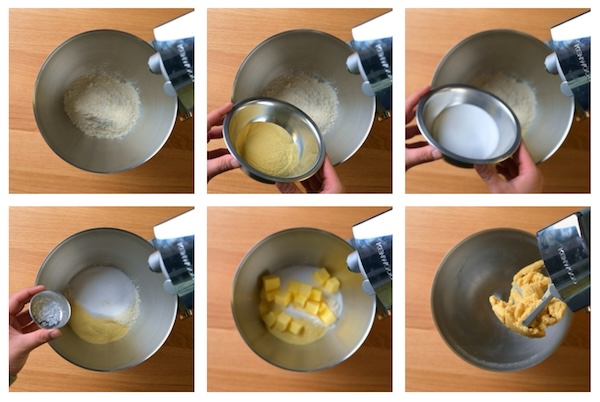
- Into a stand mixer fitted with a paddle attachment place all the ingredients into the bowl and mix. Stop mixing as soon as a dough has formed.

- Press the dough into the tin spreading to the corners. Once spread as evenly as possible run a palette knife over the top to smooth and level the dough. Pierce the dough with a fork and place the tin in the fridge for 30 minutes.

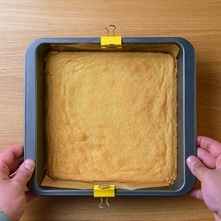
- Preheat the oven to 170℃ (338℉). Bake the biscuit for 12 - 15 minutes until lightly golden on the surface. Remove from the oven and leave to cool.

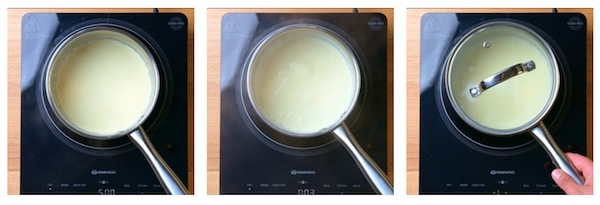
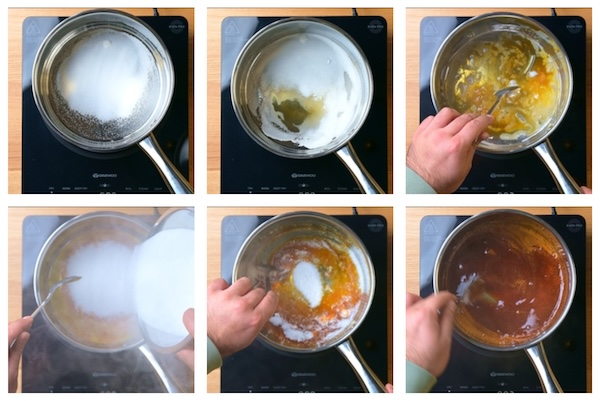
- While the dough is cooling make the caramel. First bring cream to the boil, once at a boil remove from the hob and set a side, covered with a lid.

- Into a clean saucepan, make a dry caramel. Place the pan on a low-medium heat, add in about a ¼ to ⅓ of the sugar, just enough to make a thin layer to cover the base of the pan. At this point do not mix the sugar, leave it to melt on it own.Once to start to see parts of the sugar start to caramelise you can start mixing gently by bringing the sugar from the outside of the pan to the centre. Once all the sugar has caramelised sprinkle in the next portion and gently stir in to the caramel, repeating the process until all the sugar has been added in and caramelised.

- Once all the sugar has been caramelised, turn the stove down to a low heat and in small increments add in the hot cream constantly stirring between additions. CAUTION: It is important to add cream in small amounts as adding the entire volume of cream you risk the caramel boiling over and potentially burning yourself with hot sugar!When all the cream has been incorporated boil the caramel to 115℃ (239℉). Then off the heat stir in the butter, followed by the sea salt.

- Pour the hot caramel over your cooled shortbread base while it’s still fluid; this allows the mixture to self-level for a perfectly even finish. Leave it to set at room temperature for about 2 hours, you can also put it in the fridge to set faster.
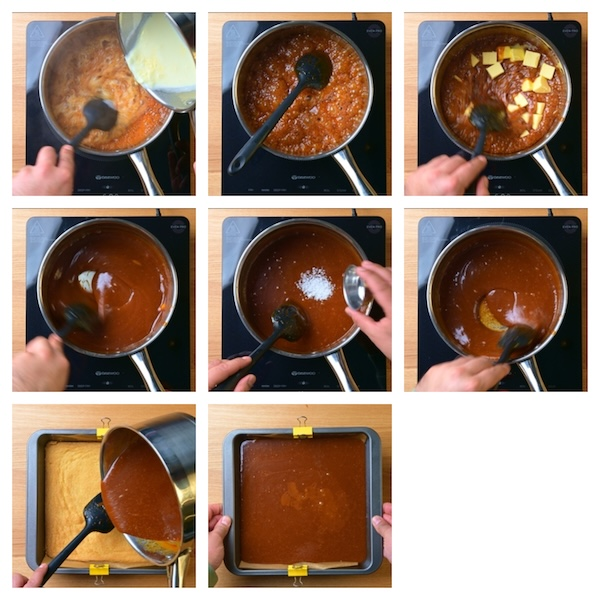
- In a microwave safe bowl add chocolate and butter. In 30 second increments melt the chocolate in the microwave stirring between each burst until the chocolate and butter are cohesive, smooth and glossy.
- Pour over the set caramel and using the back of a spoon spread to the corners of the tin until evenly distributed and finish with a generous helping of flakey sea salt.
- Leave this to set in a cool area for 1-2 hours before dividing into 16 pieces and enjoying!
