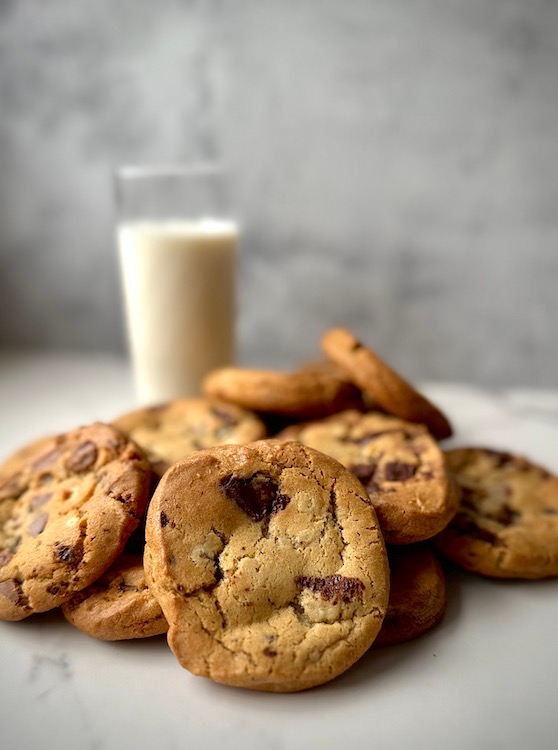
Is there anything more universally beloved than a warm, freshly baked chocolate chip cookie? That perfect balance of crisp edges, a wonderfully chewy center, and an abundance of melty chocolate chips – it’s pure comfort in every bite. While seemingly simple, achieving that ‘perfect’ chocolate chip cookie is an art, and often, a science!
My quest for the ultimate cookie has led me to this recipe for Perfectly Rich & Sweet Chocolate Chip Cookies. This isn’t just another cookie recipe; it’s a carefully crafted approach designed to deliver on all fronts: deep, satisfying sweetness, a luxurious richness, and that irresistible chewiness that keeps you reaching for more. We’ll explore the subtle nuances that make all the difference, from ingredient temperatures to baking times.
In this post, I’ll guide you through every step to create these truly exceptional cookies. Get ready to fill your home with the most incredible aroma and bake a batch of chocolate chip cookies that will become your new gold standard!
Ingredients
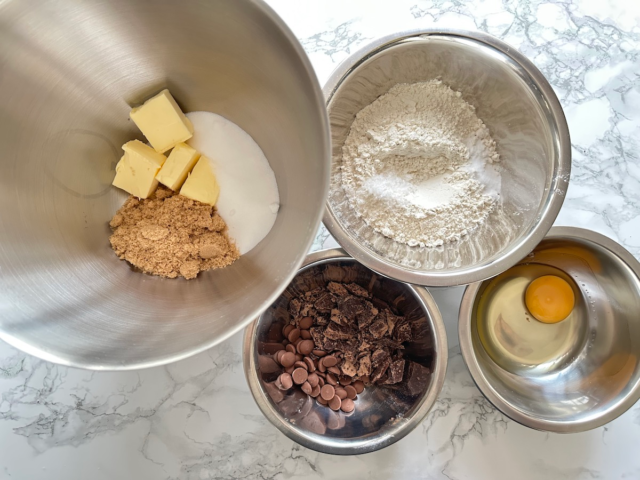
- Unsalted Butter – Unsalted butter is fundamental to these cookies, providing rich flavour and allowing precise salt control. When creamed with sugar, its solid fats incorporate air, contributing to a lighter yet chewy texture. As it melts, butter prevents excessive gluten development, ensuring a tender chewiness and crisp edges, while also enhancing golden-brown colour through the Maillard reaction.
- Light Brown Sugar – Responsible for 2 things, texture and sweetness. As it is less refined than white sugar, the natural molasses are still present in the sugar, hence the colour. The molasses contribute not only a subtle caramel flavour but moisture during the bake; which keeps the cookies soft and chewy for longer. The moisture, along with its slight acidity, also interacts with the baking soda to promote the perfect spread and browning.
- Caster Sugar – Caster sugar (superfine granulated sugar) plays a vital role in achieving the cookie’s ideal texture and sweetness. Its finer crystals dissolve more quickly and evenly into the butter, contributing to a crisper edge and a flatter spread. It also provides a clean, pure sweetness that balances the deeper notes from the brown sugar.
- Whole Egg – The whole egg acts as a crucial binder, holding all the ingredients together to form a cohesive dough. The yolk contributes richness and tenderness due to its fat content, while the egg white provides structure and helps with the cookie’s slight rise and chewiness. Together, they ensure a well-balanced texture.
- Plain Flour (All-purpose) – When baking biscuits and cookies, a plain flour with a slightly higher protein content is preferred (10-12%). This extra protein provides essential structure, ensuring your treats hold together beautifully. We actually used to use bread flour at my previous job for some cookies, I find it a little tough on the bite but still worked well. Check out my ‘The Secret Life of Flour’ post to understand more about gluten!
- Bicarbonate of Soda – AKA Baking Soda is crucial for the cookies’ spread. It reacts with the small amount of acid present (from butter and light brown sugar) to produce carbon dioxide. This reaction has a slight delay, allowing the cookies to spread more and rise less than if baking powder were used, resulting in that desirable soft, chewy centre with a lightly crisp edge. Additionally, baking soda contributes to the Maillard reaction, promoting faster browning for a short bake time.
- Sea Salt – Fine or crushed sea salt is going to enhance the chocolatey and buttery goodness!
- Dark Chocolate Chips – Dark chocolate chips are essential for adding a sophisticated edge and a delightful contrast to the cookie’s sweetness. The deep, bittersweet notes and intense cocoa flavour cut through the richness, creating pockets of complex, molten chocolate that elevate the overall taste experience.
- Milk Chocolate Chips – Milk chocolate chips offer a classic, creamy and caramel sweetness that melts beautifully, contrasting with the rich and bitter dark chocolate for the perfect balance.
- Vanilla Paste – Vanilla paste provides a concentrated, rich vanilla flavour with visible specks of vanilla bean, offering a superior aromatic depth compared to extract but You can use either vanilla paste or extract, I would refrain from using vanilla pods, the flavour of vanilla pods doesn’t always come through well in cookies without using a fair amount, which can get expensive very quickly.
All the equipment you need
- Stand Mixer or Electric Whisk
- Greaseproof Paper (Parchment)
- Baking Trays
- 10cm Cookie Cutter
- Mixing Bowl
- Digital scale
- Fine Mesh Sieve
- Wire Cooling Rack
Storing the Perfectly Rich & Sweet Chocolate Chip Cookies
Baked cookies will last up to 2 days in an airtight container at ambient.
Keep the raw dough wrapped in cling film in the freezer for up to 3 months, cut and bake as you need, perfect for preparing well in advance.
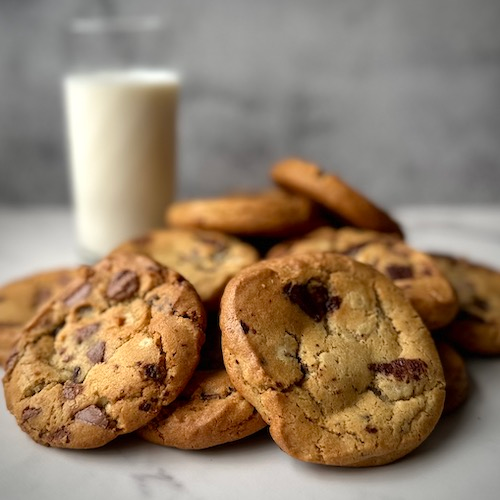
Perfectly Rich & Sweet Chocolate Chip Cookies
Ingredients
Equipment
Method
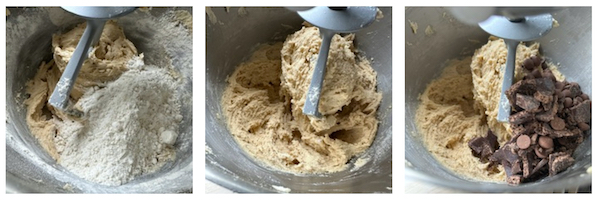
- Into a mixing bowl sift flour and baking soda to remove lumps.
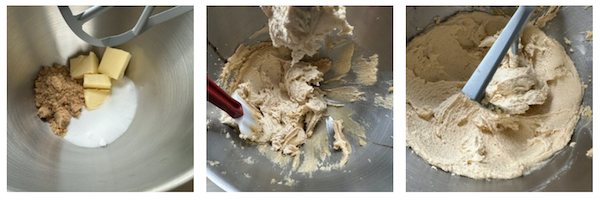
- Into a stand mixer bowl add softened butter, light brown sugar, caster sugar and vanilla paste. Cream together on a medium-high speed scraping down every so often until light pale and fluffy.

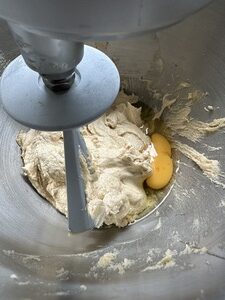
- Scrape down the bowl and add in the egg, mix on a medium speed until the egg has completely incorporated.

- Scrape down the bowl, add sifted flour, baking soda and salt in ⅓ increments on a low speed until all combined. Add in the chocolate chip and mix on low till chocolate and evenly dispersed, about 30 seconds.
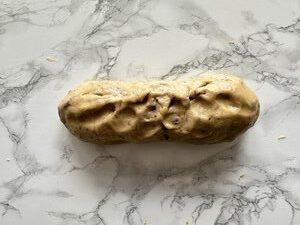
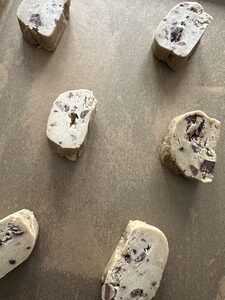
- Turn out dough onto a lightly floured worktop and roll into a log 30cm (12 inches) wide. Wrap in cling film, place onto a tray and into the freezer for an hour to set firm.1

- Preheat the oven to 160℃ (320℉). Line baking trays with greaseproof paper (parchment).
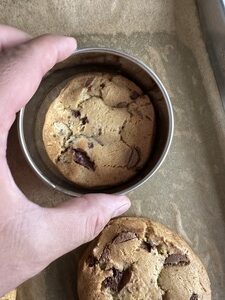
- Remove the log from the fridge and cut 2cm (¾ inch) wide disks, space out on to the baking trays (they will spread slightly) and into the oven for 13-16 minutes. Bake until there is a light golden brown colour.2
- Remove from the oven and quickly reshape the cookies with a cookie cutter and let cookies cool in the tray for 30 minutes or so before handling.3
Notes
- To form a tight, smooth log: Place a 30x40cm piece of greaseproof paper vertically on your work surface. Position the pre-rolled dough log one-third of the way from the top. Fold the bottom two-thirds of the paper over the dough. Using a metal ruler or firm, flat edge, tuck it into the base of the shortbread log and push towards you, forcing the dough to roll tightly within the paper. Repeat this rolling motion a few times until a firm, smooth log is achieved. Keep wrapped in paper and freeze until firm.
- 2 cm wide disks will give you a 50g cookie. This is why I like to roll into a log because I can cut different thicknesses for the weight of cookie I want. Also it makes for easier storage when freezing and I don't have to use the entire log, just cut what I need and bake. If you are pressed for time roll into balls of your desired weight and place in a single layer onto a tray and into the freezer for 30 minutes and then bake. Cook time will vary based on size and weight of the dough.
- Elevate the cookies by sprinkling sea salt on the cookies as soon as the come out of the oven or even with some extra chocolate chips.
- Do not over mix the dough when adding in the flour. Simply mix on low until combined to avoid the gluten from activating, this will end up making the cookie dough tight and tough to eat when baked.