Have you ever dreamt of baking that perfect sourdough loaf with its tangy flavour and open, airy crumb? The secret, the very soul of sourdough bread, lies in a vibrant and healthy sourdough starter. Often seen as mysterious or intimidating, a starter is simply a living culture of wild yeasts and beneficial bacteria. Far from being complicated, nurturing your own starter is a rewarding process that unlocks unparalleled flavour and texture in your homemade bread. This guide will demystify the process, showing you how to build, maintain, and understand the heart of your sourdough baking.
What is a Sourdough Starter?
A sourdough starter is a fermented mixture of flour and water that harbours naturally occurring wild yeasts and lactic acid bacteria from the environment and the flour itself. Unlike commercial yeast, which is a single strain, a sourdough starter is a complex ecosystem. These microorganisms work together to:
- Leaven the dough: The wild yeasts produce carbon dioxide gas, causing the dough to rise.
- Develop flavour: The lactic acid bacteria produce acids that give sourdough its characteristic tangy taste and complex aroma.
This living culture replaces commercial yeast, offering a more nuanced flavour profile and often a more digestible loaf.
Why Make Your Own Sourdough Starter?
Creating your own sourdough starter offers several compelling benefits:
- Unrivalled Flavour: The unique blend of wild yeasts and bacteria in your starter will develop distinct, complex flavours that commercial yeast simply cannot replicate.
- Control & Customisation: You control the ingredients, ensuring a natural, additive-free leavening agent. Over time, your starter will develop its own unique characteristics.
- Rewarding Process: There’s immense satisfaction in nurturing a living culture that transforms simple flour and water into the foundation of incredible bread.
- Cost-Effective: Once established, your starter is essentially free to maintain, requiring only flour and water.
What You’ll Need
Building a sourdough starter requires minimal equipment and ingredients:
- Glass Jar or Container (approx. 1 litre/quart capacity): A wide-mouthed jar is ideal for mixing and observing.
- Non-Metallic Spoon or Spatula: For mixing.
- Kitchen Scale: Essential for accurate measurements (yeast activity is sensitive to ratios).
- Plain White Bread Flour (or Wholemeal Rye/Wholemeal Wheat Flour): Unbleached flour is best. Wholemeal flours often contain more wild yeasts.
- Filtered Water: Room temperature, unchlorinated water is preferred. Chlorine can inhibit yeast activity.
- Rubber Band or Marker: To mark the starter’s height on the jar.
- Loose-fitting Lid or Cling Film: To cover the jar, allowing air exchange but preventing drying out.
Step-by-Step Guide to Building Your Starter (7-10 Days)
Consistency is key during the initial building phase. Keep your starter in a warm spot ().
- Day 1: The Beginning
- In your jar, combine plain flour and filtered water. Mix thoroughly until no dry lumps remain.
- Cover loosely and leave at room temperature for 24 hours.
- Day 2: Rest & Observe
- You might see no activity, or perhaps a few tiny bubbles. Don’t worry if nothing happens yet.
- Stir briefly. Cover and leave for another 24 hours.
- Day 3: First Feed
- You should start to see some small bubbles and a faint, slightly sour smell.
- Discard all but of your starter.
- Add fresh flour and fresh water to the remaining starter. Mix well.
- Mark the level with a rubber band. Cover loosely and leave for 24 hours.
- Day 4-7 (or longer): Regular Feeding
- From Day 4 onwards, you should see more consistent activity. Your starter should rise significantly (often doubling) and fall back down between feedings. It will also develop a pleasant, tangy aroma.
- Repeat the Day 3 process twice daily: Discard all but , feed with fresh flour and fresh water.
- If activity is slow, try moving it to a slightly warmer spot.
- When is it Ready? Your starter is typically ready to bake with when it consistently doubles in size within 4-8 hours after feeding and has a bubbly, web-like structure. It should smell pleasantly yeasty and tangy, like ripe fruit or yoghurt. This usually takes 7-10 days, but can take longer depending on temperature and flour.
Maintaining Your Sourdough Starter
Once active, maintaining your starter is straightforward:
- Regular Baking (Countertop Storage): If you bake frequently (daily or every other day), keep your starter at room temperature and feed it every 12 hours. The ratio can vary, but a 1:1:1 ratio (starter:flour:water by weight) is common.
- Infrequent Baking (Fridge Storage): If you bake once a week or less, store your starter in the refrigerator. Feed it once a week: take it out, let it warm up for an hour, discard all but , feed it as usual, let it sit at room temperature for 2-4 hours (until you see some activity), then return it to the fridge.
- Feeding Ratio: A common feeding ratio is 1 part starter, 1 part flour, 1 part water (e.g., starter, flour, water). You can adjust this to feed larger or smaller amounts depending on your needs.
Variation of Starters
Beyond the standard hydration starter, you can cultivate different types, each with unique characteristics and purposes. The hydration percentage significantly influences the quantities of microorganisms and the natural acids produced (Acetic and Lactic), defining the overall pH and flavour profile of the starter.
- Liquid Starter: Less commonly used, a liquid starter has a much higher hydration percentage, to be exact (1 part starter, 1 part flour, and 5 parts water). This high water content encourages higher bacterial populations than wild yeast, and also produces a little more ethanol. Liquid starter yields higher acetic acid than lactic acid, resulting in a lower pH () and a more pronounced sour tang in flavour.
- Regular Starter: The most common starter, with an equal hydration percentage (). This provides a more stable environment for both bacteria and yeast to grow, leading to a balanced production of acetic and lactic acid. It typically has an ideal pH (), and a more desirable, balanced flavour, often described as yoghurt-like with a subtle tang.
- Stiff Starter: This has a lower hydration, typically between . The reduced water content favours more wild yeast than bacterial organisms, thus retaining more lactic acid, breaking down less, and producing little acetic acid. Overall, it has a higher pH (), giving a more milky, yoghurty flavour with a little sweetness.
One of the benefits of having any type of starter is that you can convert it to another by simply adjusting the hydration percentage during feeding.
Deciding the Best Feed Ratio
As mentioned in maintaining your starter, the most common feeding ratio is 1 part starter, 1 part flour, 1 part water (e.g., starter, flour, water), and this is the ratio I follow for my starter. You may see other guides that recommend feeding higher quantities of flour and water, for example, a ratio of 1:5:5 (starter:flour:water). The primary issue with feeding a high quantity of flour and water is that it significantly extends the peak time of the starter.
- 1:1:1 Ratio: When strong enough and the room temperature is stable, a 1:1:1 ratio starter will typically peak around 4-6 hours after feeding, slowly collapsing and being ready for its next feed around the 12-hour mark.
- 1:5:5 Ratio: A 1:5:5 ratio starter will often peak around 10-12 hours, which is right at the time of the next scheduled feed. This means not enough time has elapsed for the starter to go hungry and fully process its food, making it less robust for the next feeding cycle.
Think of it this way: we as humans typically feed every 5-6 hours; we’ve had enough time to digest the food, and the food has travelled out of the stomach, making space for our next meal. What if we fed every 3 hours? After a little while, we would constantly be full, and in time, we wouldn’t be able to consume as much – sort of the same principle here.
I stick to a 1:1:1 ratio, feeding every 12 hours, and I make adjustments in ratios with my levain.
What is Levain?
Levain is a portion of your established sourdough starter that is specifically prepared and cultivated for a particular recipe. Your main sourdough starter is the ‘Mother’ – it’s the continuous culture you feed at a constant ratio and regular intervals to keep it healthy and active.
The levain, on the other hand, is a build you create from a small amount of your ‘Mother’ starter, tailored to the specific needs of your recipe. This is where you can adjust the hydration percentage (to create a stiff, regular, or liquid levain) and the feeding ratio based on the recipe’s requirements and your desired timing.
For example, if you want to start preparing your sourdough on a Saturday morning so you have a fresh loaf to bake on Sunday morning for brunch, but you only have until Saturday afternoon to get it made: where you would normally wait about 4 hours for your levain to be ready at a 1:1:1 ratio, you could prepare your levain at 10 pm Friday night with a 1:5:5 ratio, extending the peak time, and be ready to start making your dough around 8 am Saturday morning.
Signs of a Healthy Starter
- Active Bubbles: Lots of small and large bubbles throughout, especially after feeding.
- Consistent Rise & Fall: It reliably doubles (or more) in size after feeding and then slowly deflates.
- Pleasant Aroma: Smells tangy, yeasty, slightly sweet, or like ripe fruit.
- Web-like Structure: When stirred, it should have a stringy, web-like consistency.
- Float Test: A small spoonful dropped into water should float.
Troubleshooting Common Starter Issues
- No Activity/Sluggish:
- Cause: Too cold, not enough food, chlorinated water, or just needs more time.
- Fix: Move to a warmer spot, ensure consistent feeding, use filtered water. Be patient in the early days.
- Foul Smell (e.g., strong acetone/nail polish remover):
- Cause: Starter is very hungry and producing too much alcohol.
- Fix: Feed more frequently or increase the feeding ratio (e.g., 1:2:2 or 1:3:3).
- Mould:
- Cause: Contamination. Mould can appear as fuzzy, green, black, or even pink/orange spots. A common culprit is Serratia marcescens, a type of bacteria that can produce a red or pink pigment, often mistaken for mould. Regardless of colour, any fuzzy or discoloured growth indicates contamination.
- Fix: Discard immediately and start over. Do not try to salvage mouldy starter. It’s not safe to consume.
- Hooch (Dark Liquid on Top):
- Cause: Starter is very hungry.
- Fix: Pour it off (or stir it in for a more sour flavour), then feed as usual. This is a sign it needs more frequent feeding.
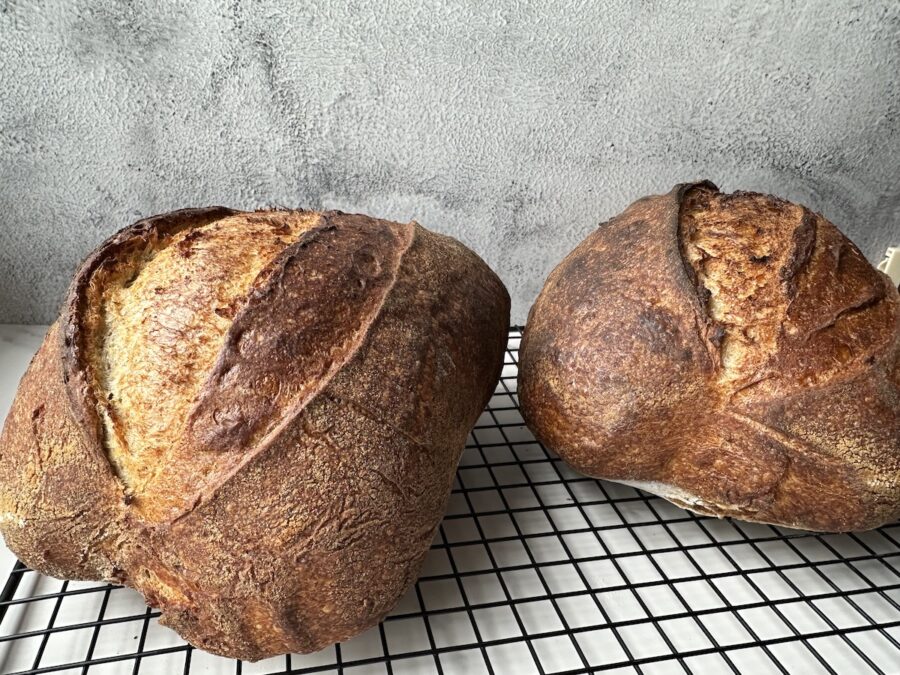
Conclusion & Call to Action
Building and maintaining your sourdough starter is a journey of patience and observation, but one that is incredibly rewarding. This living culture will become the cornerstone of your sourdough baking, allowing you to create loaves with depth of flavour and texture that are truly unique. Embrace the process, learn from your observations, and soon you’ll be baking incredible sourdough bread. Now that you know how to nurture your starter, put it to work with my ‘Classic Sourdough Loaf’ recipe and experience the magic for yourself! Happy baking!