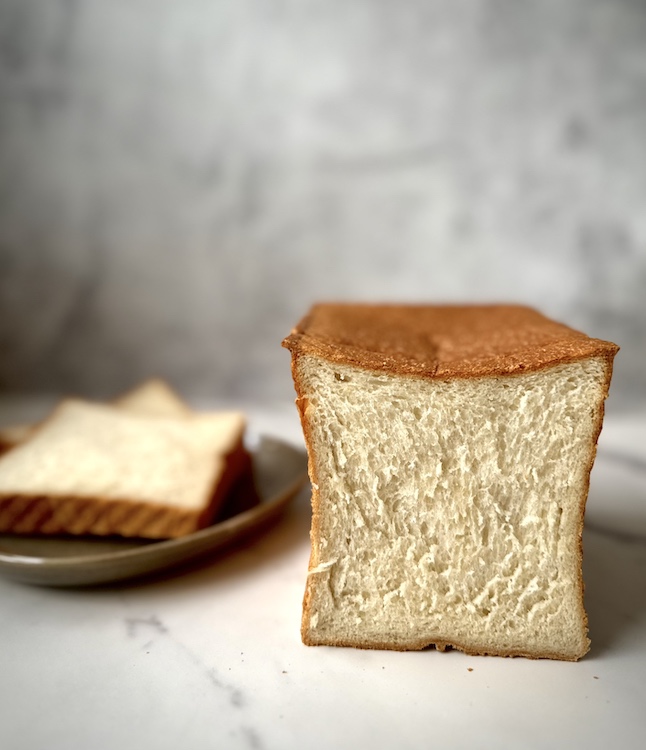
Imagine a loaf of bread so incredibly soft, so impossibly fluffy, it feels like biting into a cloud. That’s the magic of Shokupan, or Japanese Milk Bread – a true masterpiece of texture and delicate flavour. This isn’t just any bread; it’s a staple in Japanese households, celebrated for its unique tenderness and ability to stay fresh for days.
My recipe for Super Soft & Fluffy Shokupan unlocks this secret through the traditional Yudane method. This simple, yet transformative, technique involves pre-cooking a portion of the flour and water, creating a gelatinised starter that is the key to Shokupan’s unparalleled moistness and ethereal crumb. It’s a testament to how a small extra step can yield truly extraordinary results.
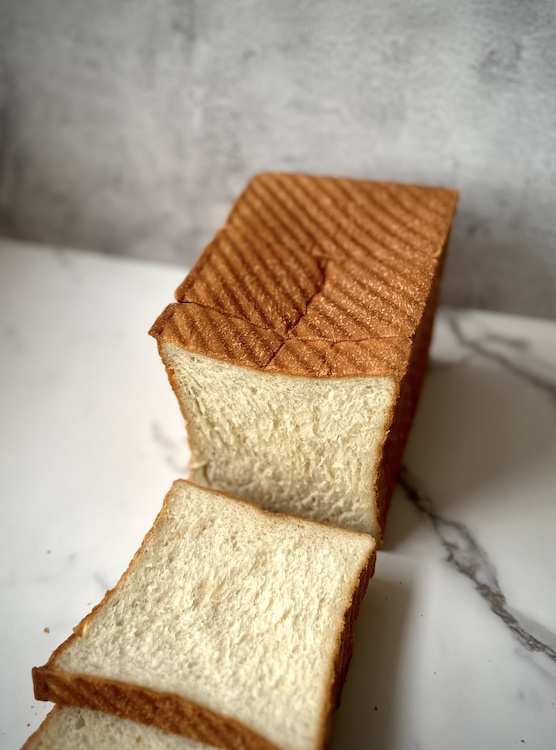
In this post, I’ll guide you through every step of creating this iconic loaf, from preparing the Yudane (gelatinised dough), to achieving that perfect, tall, and bouncy crumb. Get ready to bake a bread that will redefine your expectations of softness and become a firm favourite in your home!
Yudane vs Tangzhong
Both are effective in bringing the softness and tenderness to bread, but there is a huge difference in how they are made and handled before being used in a recipe. Yudane is traditional to Japanese recipes and tangzhong more towards Chinese recipes.
So how are they made? Yudane is made with 1:1 ratio of bread flour to water, to which boil water and pour over flour and bring together till dough is formed rest in the fridge for 12 hours to allow the flour to gelatinise. Tangzhong on the other hand uses a higher volume of water 1:5 ratio bread flour to water. You essentially make a roux or paste by bringing water and flour to a pan and cooking it out till 65℃ (149℉) and let it come down to room temperature before using. In both case when writing a recipe to make either yudane or tangzhong, you would take 20% of the total bread flour in a recipe. For example, if a recipe calls for 300g of flour, 300 x 20% = 60g, 60g is what you would use for either yudane or tangzhong.
The water content in the yudane or tangzhong also contributes to the overall hydration percentage. For more on hydration read my ‘Mastering Dough Hydration: The Key to Perfect Texture’ post
Ingredients

- Bread Flour – is the cornerstone of Shokupan, chosen for its higher protein content (typically 12-14%). This elevated protein level is crucial for developing strong gluten networks, which give the bread its characteristic chewiness, elasticity, and the ability to rise significantly, creating that signature fluffy texture. For more on gluten read ‘The Secret Life of Flour’
- Sugar – serves multiple purposes beyond just sweetness. It provides essential food for the yeast, aiding in fermentation and a good rise. Additionally, sugar contributes to the bread’s tender crumb, helps achieve a beautiful golden-brown crust, and enhances its overall flavour.
- Table Salt – is vital for balancing the flavours in Shokupan, preventing it from tasting bland. It also plays a key role in controlling yeast activity, ensuring a steady and even rise, and strengthens the gluten structure, contributing to the bread’s desirable texture.
- Unsalted Butter – adds a luxurious richness and incredible tenderness to Shokupan. Its fat content coats the gluten strands, inhibiting excessive gluten development and resulting in a softer, more delicate crumb. Using unsalted butter also allows for precise control over the overall salt content of the loaf.
- Instant Active Yeast – is the leavening agent responsible for the bread’s rise. It’s a convenient form of yeast that can be added directly to the dry ingredients, quickly becoming active in the presence of moisture and warmth to produce carbon dioxide, which creates the airy structure of the Shokupan. To understand more about yeast and it’s varieties check out my ‘Understanding Yeast: Your Guide to Perfect Fermentation’ post.
- Whole Milk – contributes significantly to Shokupan’s signature softness, richness, and delicate flavour. The fats and sugars in whole milk tenderise the crumb, enhance browning, and provide a subtle sweetness that complements the bread’s overall profile, resulting in a more luxurious texture than using water alone.
- Yudane – The Yudane is the secret to Shokupan’s extraordinary softness and extended freshness. It’s a pre-cooked paste made from a small portion of the bread flour and hot water. This process gelatinises the starch in the flour, allowing it to absorb and retain significantly more moisture, which translates to an incredibly tender, moist, and long-lasting loaf.
All The Equipment You Need
- Stand Mixer with a Dough Hook
- Heavy Bottom Saucepan
- Bread Prover – This is how I made my bread prover for under £50: ‘My Homemade Dough Prover: The Key to Consistent Bakes’
- Pullman Loaf Tin 450g
- Bake Spray
- Dough/Bench Scraper
- Rolling Pin
- Mixing Bowl
- Digital scale
- Wire Cooling Rack
Storing Shokupan
Shokupan will keep at ambient in an airtight container for up to 2 days and 4 days in the fridge.
You can also freeze a baked loaf for up to 2 months. Once thawed the texture may be impacted.
Authentic Shokupan (Japanese Milk Bread) with Yudane
Ingredients
Equipment
Method
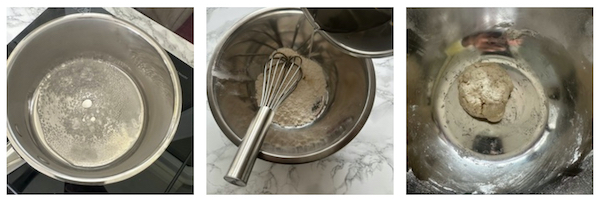
- Boil water in a saucepan or kettle (needs to be over 90℃ (195℉)) and pour over the flour, mix together until combined and you have a gelatinous dough. Wrap in cling film and place into the fridge overnight.1

- Remove the Yudane from the fridge and rest it on the worktop for 15 to 30 minutes to allow it to come up in temperature. If you have a bread prover set it to 25℃/77℉.2 (You can still make this without a prover)
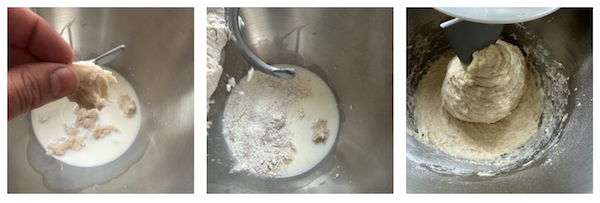
- Into the stand mixer bowl, add milk, sugar, yeast and yudane. Tear yudane into small pieces when adding in.

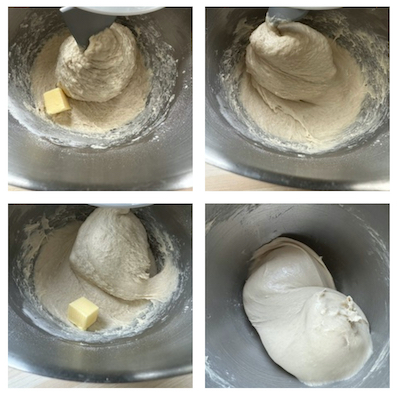
- Turn the mixer on low and feed flour and salt into the bowl in small increments (you may need to aid it by scraping the bowl every so often). Once a dough starts to form turn mixer up to a medium speed for 2 minutes (we only want to start activating the gluten before adding in fats)
- Turn mixer to a medium-low speed and slowly feed in the butter and allow it to incorporate. Once the butter is mixed in, turn the mixer up to high and knead for 5 minutes.3

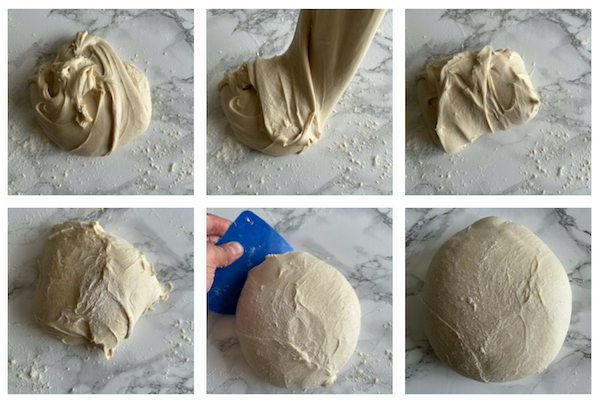
- Lightly flour your work surface and turn the dough out. Pinch a corner of the dough, stretch outwards and fold over onto itself to the centre of the dough. Continue to do this working your way around the dough to form a rough ball. With your dough scraper scoop up the dough and turn over. Use the dough scraper to roll and tuck the dough to form a smooth and tight ball.

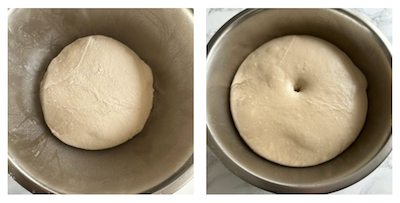
- Place the dough into a lightly greased bowl and cover with cling film4 and set into your prover for 1 hour or until it has doubled in size. If you don't have a dough prover leave on the kitchen counter until doubled in size. To check the dough has correctly risen, flour the tip of your finger and press into the centre off the dough. The dough should still hold without deflating and the indent should remain there.

- Turn dough out onto a lightly floured work surface, divide into 3 equal pieces. Like you did previously form into 3 balls. Roll the dough balls into a rectangle 15x20cm. Fold the edges to meet in the middle, then tightly roll from one end to the other. Place into a lightly greased loaf tin, cover with cling film and into the prover for 45 minutes. We want the dough to rise about 85% of the tin height.

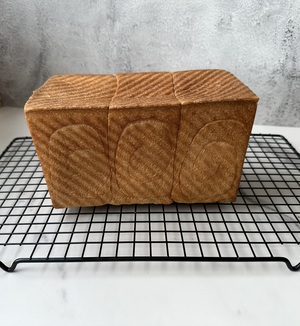
- Preheat the oven to 180℃ (355℉). Lightly grease the inside of the lid and close the loaf tin. Bake for 35 minutes.5
- Remove from the lid and let the bread cool in the tin for 15-20 minutes before turning out onto a wire cooling rack.


Notes
- It's important to let the Yudane rest for 12 hours or overnight. Crucially, resting the dough allows the flour's starch to fully gelatinise, absorbing extra water. This creates a more stable, elastic dough that retains moisture exceptionally well, resulting in a loaf with superior softness and a wonderfully delicate crust that lasts longer.
- A bread prover allows precise control over both temperature and humidity, ensuring consistent conditions for dough proofing. Here is how I made my prover: 'My Homemade Dough Prover: The Key to Consistent Bakes'
- To start with, the dough will spread across the bowl. As the gluten develops the dough will start to come together, once it comes together and very little is sticking to the bottom or walls of the bowl your, dough is ready.
- Instead of cling film I use shower caps, they are cheap and reusable.
- You can bake without the lids if you want a domed loaf. Milk wash the top of the loaf before baking.