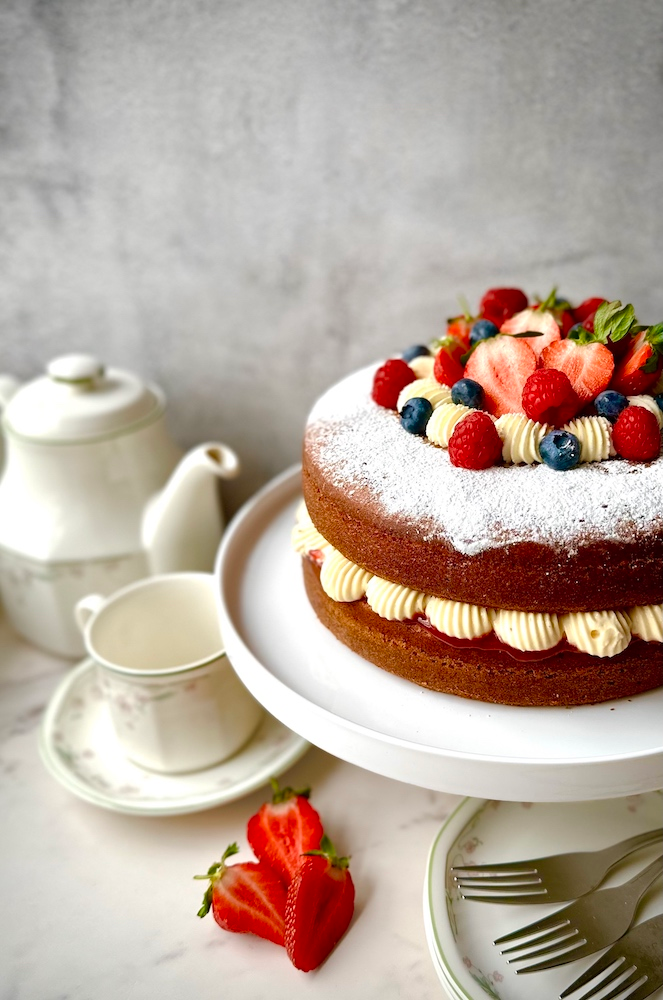
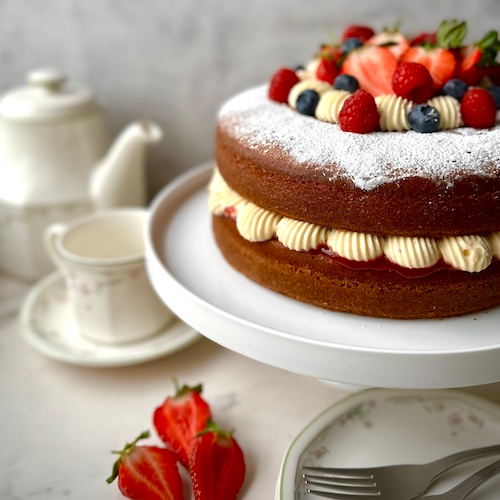
Few cakes evoke such a sense of comforting nostalgia and quintessential British charm as the Victoria Sponge. Named after Queen Victoria herself, who was said to enjoy a slice with her afternoon tea, this timeless classic is the epitome of simple elegance. It’s not about elaborate decorations or complex flavors; it’s about perfecting the fundamentals: a light, tender sponge, a generous layer of sweet jam, and a dollop of rich, fresh cream.
While seemingly straightforward, the Victoria Cake is a masterclass in foundational baking techniques. Achieving that perfectly airy crumb and balanced flavor requires attention to detail – and a little understanding of how your ingredients work together. This cake is a true test of a baker’s touch, where precision leads to perfection.
In this post, I’ll guide you through my tried-and-true recipe for the classic Victoria Cake, ensuring you achieve that iconic light texture and delightful balance of flavors every single time. Get ready to bake a slice of history and bring a touch of British afternoon tea tradition into your home!
Ingredients
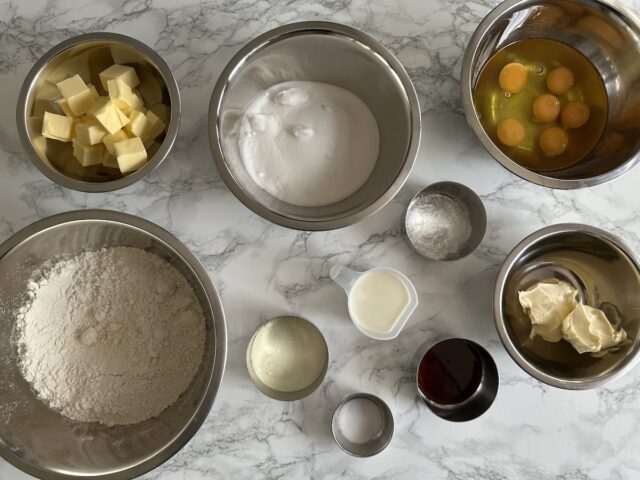
- Plain Flour/Cake Flour – In the UK we don’t get cake flour like other parts of the world. The main thing to look at is the protein content, we want a flour with 9% or below. A lower protein percentage means there is less glutenin and gliadin thus less of a chance of developing the gluten in the mix once the flour is hydrated. Check out my ‘The Secret Life of Flour’ post to understand more about gluten!
- Unsalted Butter – Butter is going to provide the essential flavour to a tender crumb, also the essential fats to hold the air that is incorporated in.
- Baking Spread/Margarine – Baking spreads are a hydrogenated oil, it is lighter and softer than butter even at fridge temperature. Replacing some of the butter with a baking spread lets us add extra moisture to the final sponge. It also helps keep the sponge moist when stored in the fridge, butter at fridge temp is solid so if you have a cake that is made with purely butter and store it in the fridge naturally the butter is going to set firm. That being said they are interchangeable, you can use one or the other, or a mix of both with this recipe.
- Caster Sugar – The granules of caster sugar are a lot smaller than granulated sugar. It is the preferred sugar for pastry chefs as it dissolves better into fats when mixed.
- Whole Eggs – Whole eggs are going to provide additional flavour with the egg yolks and most importantly act as a binder to give the cake structure.
- Vanilla Paste – You can use either vanilla paste or extract, I would refrain from using vanilla pods, the flavour of vanilla pods doesn’t always come through well in sponges without using a fair amount, which can get expensive very quickly.
- Salt – Will help enhance the flavour the sponge that little more.
- Baking Powder – This is a leavening agent, alongside the air we incorporate through creaming the butter and sugar, baking powder will produce carbon dioxide gas to aid in the rise of the sponge giving it a light and airy texture.
- Milk – The milk will help loosen the batter a little more, add additional moisture, flavour and aid in the maillard reaction.
All the equipment you need
- Stand Mixer or Electric Whisk
- Mixing Bowl
- Digital scale
- Silicon Spatula
- Fine Mesh Sieve
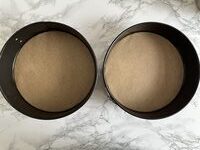
- 8 Inch Springform Tins x 2
- Wire Cooling Rack
- Palatte Knife
Storing you Victoria Sponge
Sponges wrapped will last in the fridge for up to 3 days. An assembled cake is best consumed on the day however it will store in the fridge for up to 3 days in an airtight container.
Classic Victoria Sponge
Ingredients
Equipment
Method
- Preheat the oven to 150℃ (300℉). Grease the base of the 2 cake tins and line with greaseproof paper (parchment paper)1

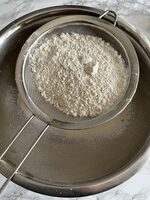
- Into a mixing bowl sift together flour, baking powder and salt.

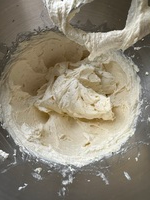
- Into your stand mixer bowl or large mixing bowl cream together butter, baking spread, caster sugar and vanilla paste with a paddle attachment on medium to high speed until pale and fluffy . Scrape down the bowl every so often to make sure all the butter is mixed in.2
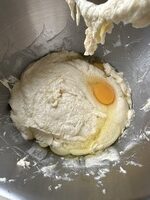
- Scrape down your bowl and add one egg at time on a medium speed. Allow the egg to completely incorporate and scrape your bowl before adding in the next.3
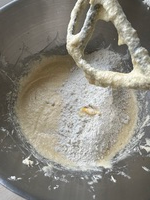
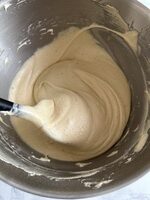
- Once all the egg is incorporated, add the dry ingredients in ⅓ at a time on a low speed scraping down the bowl in between. Followed by the milk4
- With a spatula give the batter a quick mix just to ensure anything at the bottom of the bowl is mixed in. Split your batter across the 2 tins, approximately 600g in each and spread out evenly with a spatula.
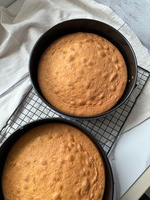
- Bake for 25-35 minutes until golden brown. Insert a toothpick into the centre, if it comes out clean the sponges are ready. Leave the cakes to cool in the tin for 20-30 minutes then turn out onto cooling racks.5
- When you are ready to assemble, cut the top of one the sponge this will be the base of the cake. Smooth out the jam with the back of a spatula and spread evenly across the base of the cake. Whip the cream, icing sugar and vanilla paste to medium peaks and spread out evenly on top of the jam with a palate knife.6
- Top the cake with the second sponge and dust with icing sugar.
Notes
- I only grease and line the base of the pan. I never grease the walls of a tin, I find greasing the walls of the tin cause the cake batter to sink during the cook and you end up with a dense cake.
- You are looking for a pale and fluffy texture, if you pick up the creamed butter with the paddle attachment or spatula it should hold firmly to it. You are actually better off under mixing the butter and sugar than over-mixing. Over-mixing will have too much air incorporated and will cause the cake batter to sink and crack during the bake resulting in a dense and stodgy cake. Under-mixing will have less of a rise but the sponge will contain air pockets making it a little more enjoyable to eat.
- To help with emulsifying the egg into the butter, after each egg is added mix in a tablespoon of your dry ingredients. This is effective especially when using hydrogenated oils, the heat from mixing can bring the temperature up of the baking spread and potentially separate when adding more fats.
- You just want to gentle fold in the dry ingredients, mixing on a fast speed is going to active the gluten and you will end up with a tough, dry sponge. The milk will help loosen the batter a little more, add additional moisture, flavour and aid in the maillard reaction.
- If you are baking your sponges in advance, once the cakes have cooled slightly in the tins, wrap them in cling film while still warm. The sponges will effectively steam off the residual heat and stay soft. Place in the fridge until you are ready to assemble.
- Elevate your Victoria Sponge by replacing the whipped cream with crème diplomate.
- It is important to have all ingredients at room temperature in order for all the fats to emulsify. A difference in temperature will cause fats to split out during the mixing and result in an uneven bake and a cracked sponge.
- If you have slightly over baked your sponge and its a little drier than you would like it, fear not! Make a simple syrup, equal parts sugar and water with some vanilla paste and bring to a boil. Let it cool down slightly and soak your sponges. We'll keep that between us!